
How To: Setup your own plumbed dust collection system
Plumbed dust collection is paramount to a clean shop, healthy lungs, and eliminating trip hazards, but setting it up can be quite a pain. That’s why I’ve created a 2-phase system you can follow to make this process easier to plan and help you figure out what you’ll need to buy, no matter where you’re buying your components from.
*All items mentioned are linked here. (This file is also linked at the bottom of Phase 1 & Phase 2)
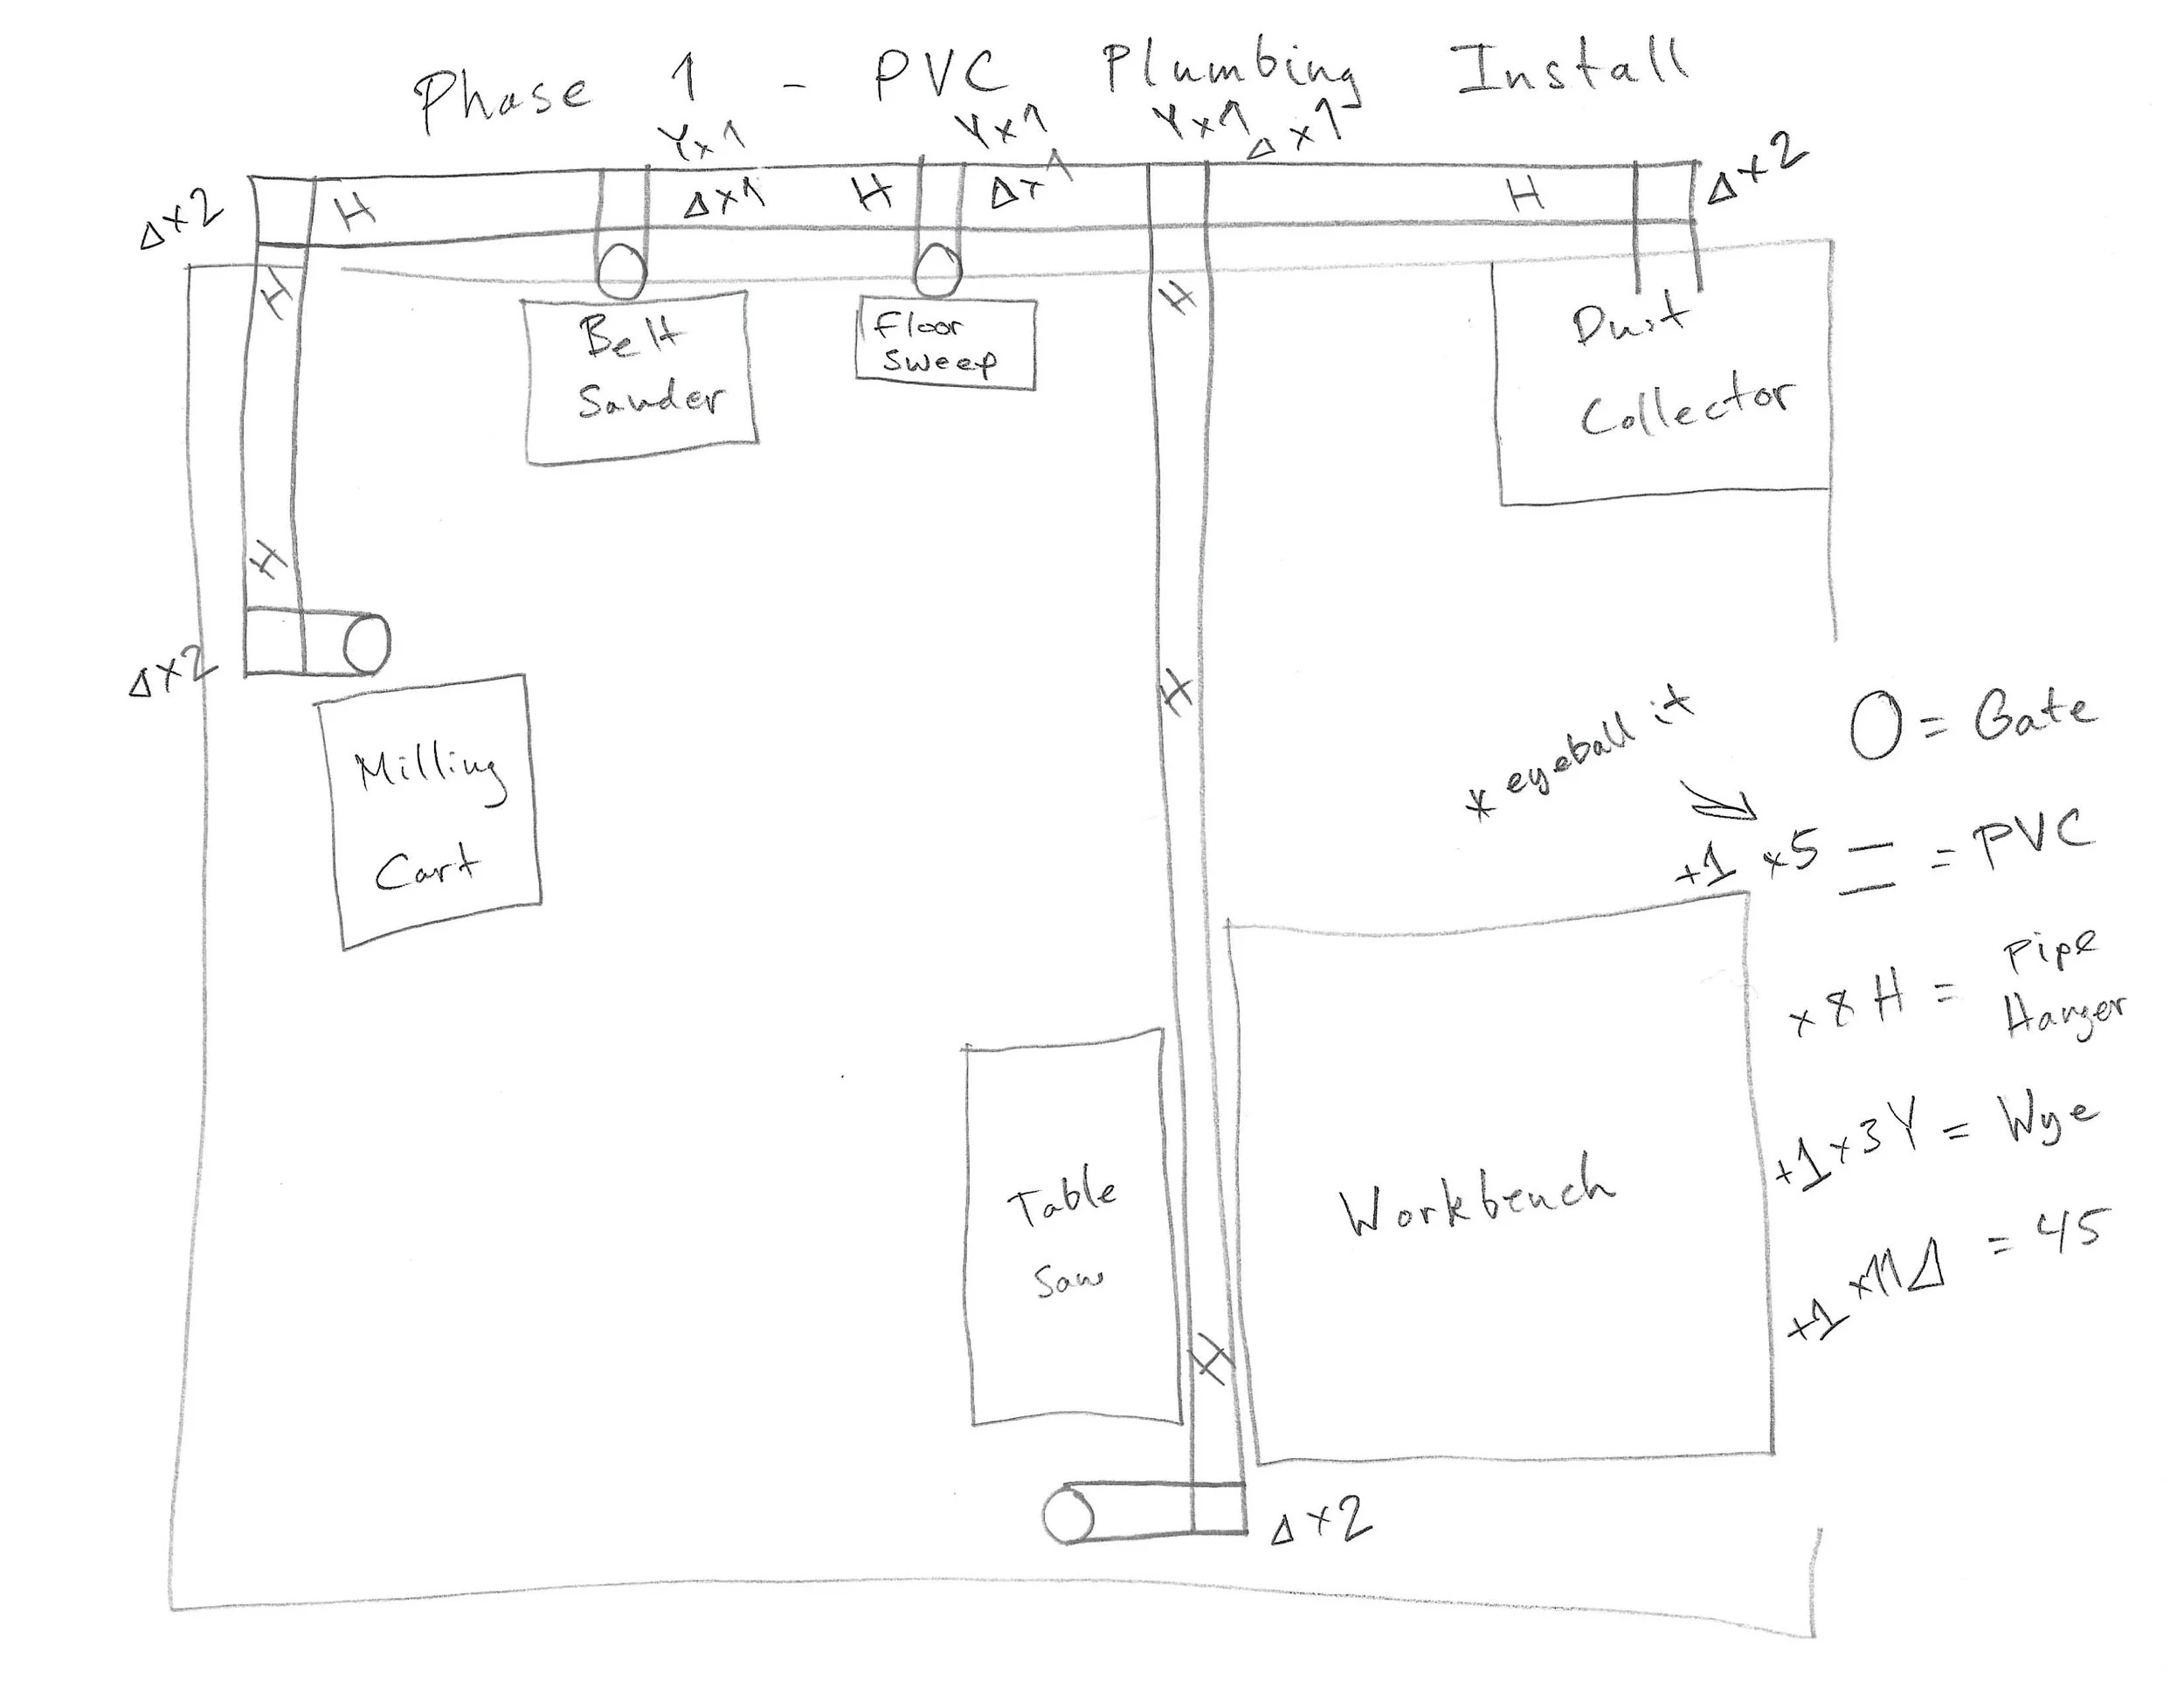
Phase 1 - PVC Plumbing Install
This might sound kind of boring, but in order to eliminate the hassle of multiple trips to the store and repeat online orders, creating a sketch of your prospective dust collection system will be needed.
Here’s how I’d advise going about creating such a sketch:
Roughly sketch out your shop
Add your tools (*this is a good time to re-orient things if you’ve never taken the time to strategically place them)
Create a key for needed items. We’ll start with just a focus on the following for our main and branch runs:
-Blast Gates (generic for now)-4” PVC Pipe
-Pipe Hangers
-Wye Fittings
-45° Fittings
Draw your primary pipe run
Draw your branch runs to each tool
Go through and add icons (from your key) to get an idea of your parts list
Here is the example sketch I did for my shop:
Once you’ve gathered all the parts you need, you can transfer the inventory list over to this parts tracking worksheet I’ve created here. This sheet also includes links to each product so it will be easier to know exactly what you need.
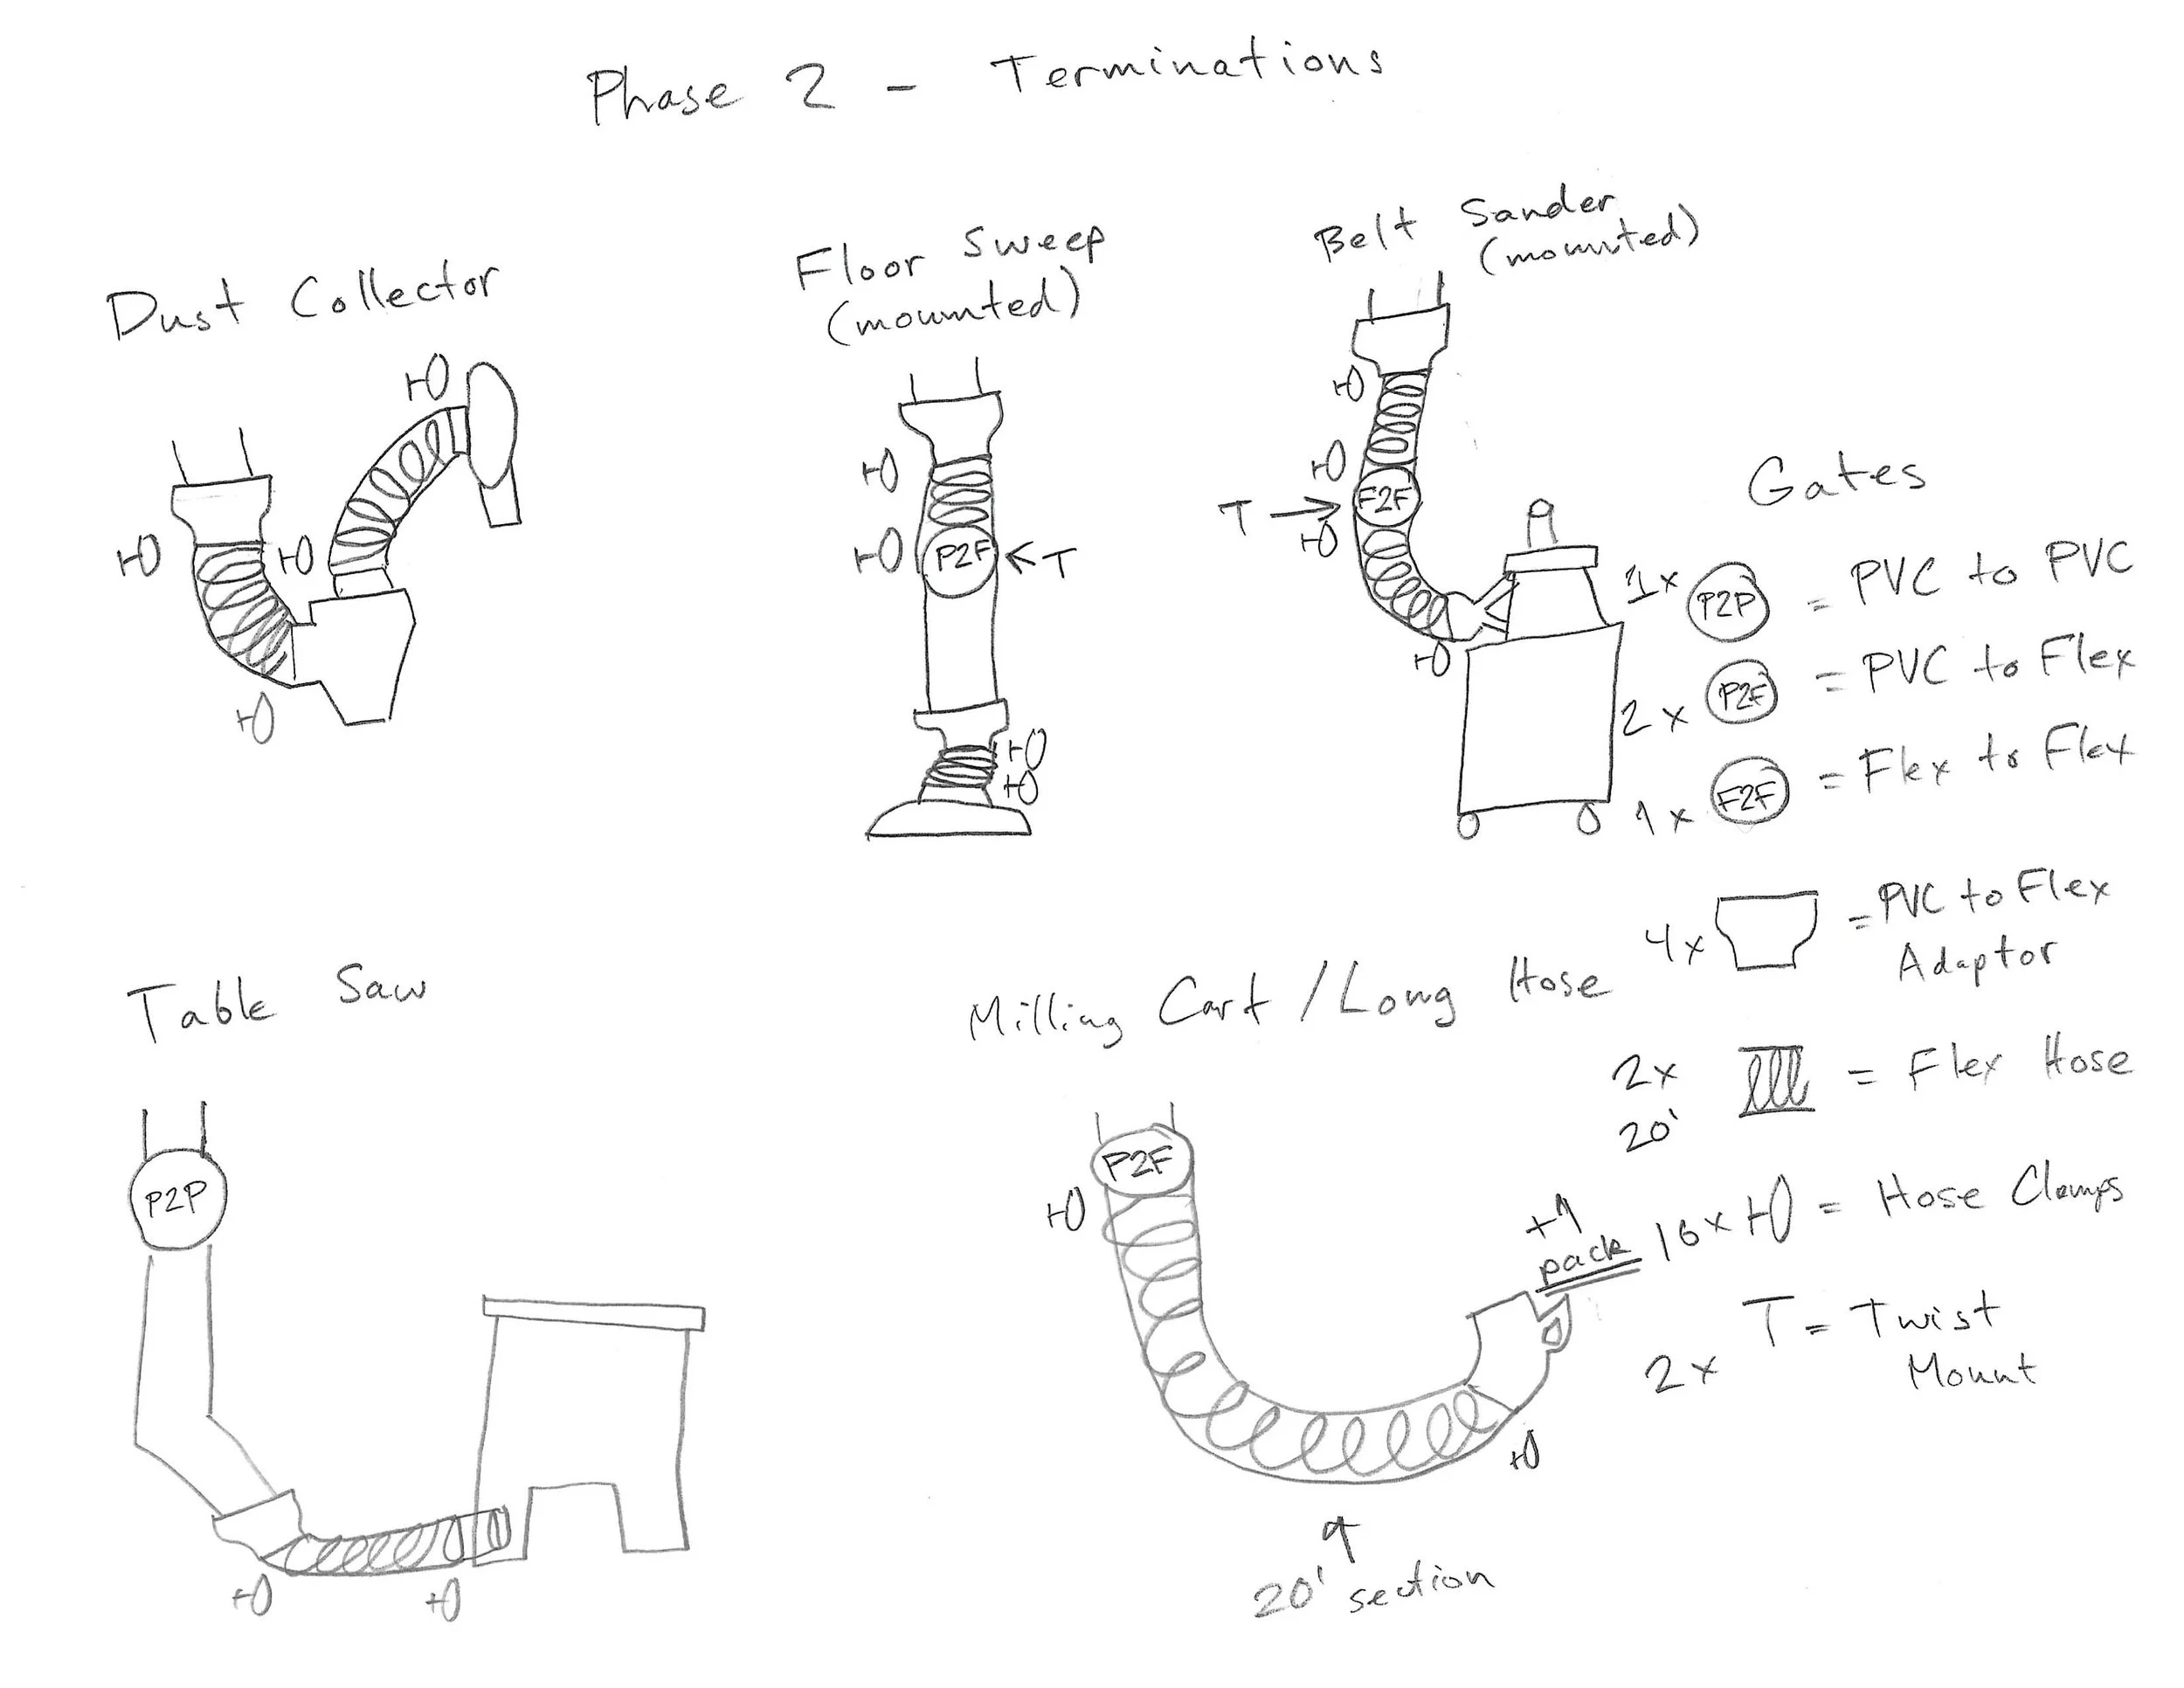
Phase 2 - Terminations
“Terminations” is a term used in networking to refer to where a cable is capped with a plug, making it usable for sending network traffic to a device. In this case, I am adapting the term to refer to how we connect our PVC pipe to flex hose, mount our blast gates, connect our tools, etc. In this phase we will create sketches to the tools and figure out what components we’ll need to make those connections.
We’ll want to make a sketch for each tool in this case:
Start by sketching the “drop” in our pipe
Add a sketch to represent your tool
Create a key for needed items. This time, we’ll specify the type of blast gate to each tool:
-P2P - PVC to PVC Gate-P2F - PVC to Flex Gate
-F2F - Flex to Flex Gate
-PVC to Flex Adaptor
-Flex Hose
-Hose Clamps
-Twist Mount
Start adding the above components to create a connection between your pipe and the tool
Once all tool terminations have been sketched, go through and count up your needed components.
As before, here is an example sketch I used to create the terminations in my shop:
I’ve also created an inventory sheet for this phase here.